

Gold Grain Identification: How to Read Visual Clues and Next Steps
Practical gold grain identification advice: which visible clues matter, a step-by-step photo workflow, and safe next steps when a picture alone isn’t enough.
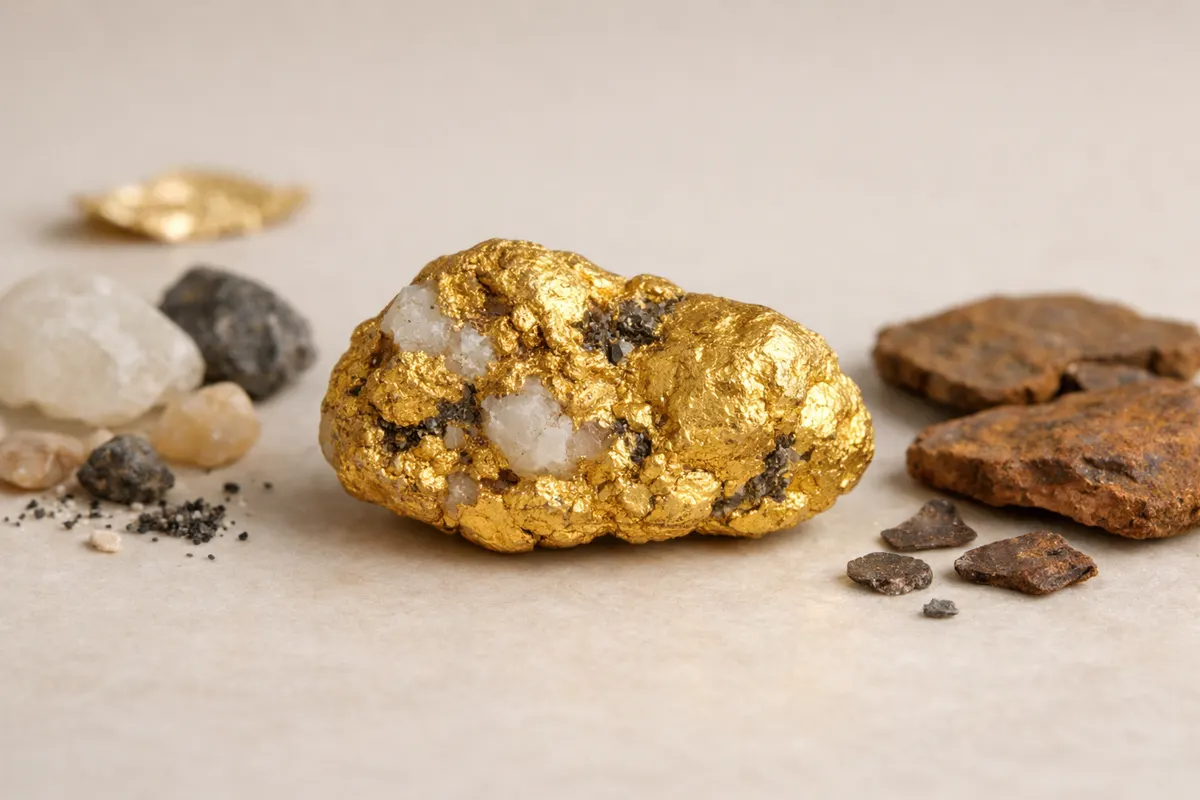
Quick answer for gold grain identification
Gold grain identification starts with documenting the sample: photograph the grain with a clear scale and bright, diffuse light, then compare its visible color, luster, shape, and existing surface texture with documented references. Small grains may need a well-focused close-up to show useful detail. Keep the original sample intact and record the context in which it was found. The result is a candidate identification to investigate, not a photograph-based composition or purity measurement.
Photos can suggest a shortlist, but they do not establish that a grain is gold or determine its purity. Use the image to decide which observations to document and whether professional verification is worthwhile. Preserve the sample as found: a streak test, scratch, or pinch can alter it, and a small grain may be difficult to recover after handling. Include a wider context image, a size reference, and several clear angles so a qualified reviewer has useful starting evidence without requiring you to damage the specimen.
A gold identification guide: what grain traits tell you
This gold identification guide organizes the details you can record from a grain-sized sample: visible appearance, size, condition, and the context in which the material was found. A photograph can show color, shine, edge shape, and the relationship to surrounding material. It cannot measure density or prove composition. Use these observations to compare possible matches and decide what needs checking next, rather than treating a familiar appearance as a completed identification.
Optical appearance describes how the surface reflects light, but lighting, camera settings, dirt, and coatings can change what a photograph appears to show. Record color and luster in diffuse light and from more than one angle. Do not clean, polish, scrape, or chemically treat an unfamiliar or potentially valuable sample merely to make its appearance easier to compare. Preserve the original condition and ask a qualified professional how to prepare the specimen if examination or analysis is needed.
Physical properties can be useful to a qualified examiner, but obtaining them is not automatically harmless. Pressing, scratching, pinching, or rubbing a grain on ceramic can change its surface or shape. Density measurements on very small or irregular pieces can also be difficult to interpret. At home, prioritize documentation. If a sample can be weighed without losing or damaging it and a suitable scale is available, record the measurement with its limitations; otherwise leave the weight unknown and let the receiving professional advise on appropriate testing.
Key clues
When judging a grain from photos, prioritize a short checklist: color consistency, edge shape, surface texture, and relative heft. Use multiple, well-lit close-ups plus a wider shot that shows where the grain sat (sediment, rock crevice, jewelry setting). Photos that include a ruler, a common object, or calipers make size and proportion immediately useful.
Below are the practical clues that distinguish likely gold from common lookalikes. Treat each clue as adding probability rather than proof—when several clues align, confidence grows; one conflicting trait should trigger further testing.
- Color and hue: true gold shows a warm, deep yellow that doesn’t flash green or reddish under white light.
- Luster: metallic and soft shine that stays consistent from different viewing angles.
- Edge shape: gold grains from streams are often rounded and smooth; sharp cubic or crystalline edges suggest pyrite or other sulfides.
- Condition: document existing dents, chips, and surface texture; do not create a new mark to test malleability.
- Weight: record only a suitable, safely obtained measurement; apparent heft is not proof of composition.
- Surface texture: photograph existing features from several angles without scraping or rubbing the sample.
- Contextual clues: location (placer vs vein), host material (quartz, sulfide-rich ore), and nearby findings from the same sample increase likelihood.
- gold visual clues: photograph color, sheen, and edge profile in at least two lighting conditions to capture reliable detail.
Step-by-step workflow for identifying gold grains from photos
Turn uncertainty into action with a simple, repeatable workflow. First, collect photos: macro close-up from two angles, a top-down shot with scale, and a contextual image showing surrounding material. Lighting should be bright but diffused—direct harsh sun creates glare and hides texture. If available, a macro lens or a phone camera with a macro mode will reveal edge shape and surface texture.
Second, preserve and organize the evidence. Keep the grain secure, retain any associated information, and avoid scratching it against ceramic or squeezing it to see whether it deforms. Those actions can damage a small sample and do not provide a stand-alone composition result. Record what you already observed, including any coating, damage, or uncertainty in the lighting. If the sample may have historical, collectible, or significant commercial value, ask a qualified specialist about handling before making physical changes.
Third, record a weight only when the equipment and handling are suitable for the sample. Note the scale's resolution and whether the reading is repeatable, rather than reporting more precision than the setup supports. If a tiny grain cannot be handled or weighed reliably, leave that field unknown. Share the photographs, context, and any reliable measurement with a qualified examiner, who can advise on the appropriate analysis and its limits. Confirmation of composition or purity requires more than appearance, a magnet response, or the way a grain feels.
- Photo checklist: macro close-up (two angles), scale or ruler in frame, contextual shot of host material.
- Conservation first: no ceramic streak, scratch, or pinch test on an uncertain sample.
- For composition or purity questions, ask a qualified examiner which analysis is appropriate and whether it alters the sample.
- Document everything: date, GPS or location description, how the sample was recovered, and any nearby finds.
Practical examples of gold grain identification
Example 1 — Stream pan grain: a small, rounded yellow grain is photographed beside a ruler and with the surrounding concentrate visible. The appearance and find context may make gold one possibility, but neither establishes the identity or purity of the sample. Record the observations without pinching or rubbing the grain, retain the original material, and ask a qualified examiner about the next appropriate check if confirmation matters. This example is a documentation workflow, not a claim that a matching photograph proves placer gold.
Example 2 — Brassy flake in host rock: close-ups reveal angular surfaces and changing reflections. Several minerals or surface coatings can produce a gold-like appearance, so record those features without deliberately scraping the flake to see whether it powders. Compare the visible details with documented references and keep alternatives open. The related post Gold vs Pyrite: Visual Clues, Lookalikes, and Next Steps (https://golddetector.app/blog/gold-vs-pyrite) can help organize questions, while a qualified examiner can advise how to distinguish the sample without unnecessary damage.
Example 3 — Small bead associated with jewelry: photograph the bead and any existing marks on the setting, and record how the pieces were associated. A hallmark on a separate setting does not establish the bead's composition, and an indentation would not prove a particular karat or rule out plating. Keep the object intact and document the uncertainty. If value or purity matters, consult a qualified professional about suitable analysis before using a scrap calculator or making a sale description based on an assumed metal content.
Limitations of gold grain identification from photos
Photos are powerful for triage but inherently limited. Small scale, lighting artifacts, surface coatings, and camera color balance can all mislead even experienced observers. A single strong-looking trait (color, say) can be offset by a contradictory trait (brittle fracture), and without physical tests the risk of false positives remains real—especially with lookalikes like pyrite, chalcopyrite, mica-coated fragments, and certain copper minerals.
Keep the result proportional to the evidence. A clear photograph can support observations such as yellow color, rounded edges, or an existing surface texture. It can also suggest several possible materials to compare. It should not be converted into a purity figure, a claim that plating has been ruled out, or a sale description declaring confirmed gold. When you share the result, distinguish observations you recorded from the candidate identity and the questions that remain for professional verification.
When to verify professionally: if the grain’s value matters (possible sizable nugget, jewelry appraisal, or legal ownership situation), use certified assays or a trusted local assayer. If you need a purity or karat calculation, pair physical testing with a reputable lab rather than relying on visual ID or a single app result. Photos help the lab triage samples but don’t replace analytical confirmation.
Safety and legal notes: don’t handle potentially valuable finds in a way that damages provenance, and be aware of local regulations for mineral collection. If recovery from private land or protected areas is involved, check permissions before removing samples for testing.
Related guides
Next step: use a methodical first pass, then confirm
If your photos and simple checks point toward gold, a methodical first pass helps you prioritize samples for further testing. You can use Gold Detector - Goldiva as one optional first-pass tool to organize photos, record checklist results, and compare visible clues before deciding on lab assays or local testing services. Visit https://golddetector.app/ to learn how the app fits into a careful identification workflow—remember that visual checks are a first step, not a substitute for professional confirmation.
Take the next step →Frequently asked questions
What is the simplest gold identification guide I can follow in the field?
Start by documenting the grain in diffuse light with a size reference, more than one viewing angle, and a wider context image. Record what is visible and keep possible lookalikes open. Avoid ceramic streak, scratch, pinch, or cleaning tests on an uncertain or valuable specimen; these can alter it. Weigh only if suitable equipment and safe handling make that practical. For composition or purity confirmation, ask a qualified examiner which analysis is appropriate and what effect it may have on the sample.
How should I photograph grains to capture the most useful gold visual clues?
Use even light and take close-up views from more than one angle plus a wider image showing the surrounding material or associated object. Put a size reference nearby without contacting or moving a fragile specimen unnecessarily. Keep the grain in its original condition; do not clean or polish it just to improve the photograph. Save notes about where and how it was found so a reviewer can separate visible observations from assumptions.
What gold types should I expect in river pan samples and how do they differ visually?
River-recovered samples can include rounded grains, flattened flakes, and many visually similar materials. Shape can be useful context, but a photo does not establish native gold, its purity, or how it was deposited. Record the sample as found, compare documented examples, and keep the identification provisional. When composition or value matters, a qualified examiner should select and interpret the relevant analysis rather than relying on a visual type alone.
When should I send a grain for professional testing instead of relying on photos?
Seek qualified verification when composition or purity affects a sale, valuation, significant collecting decision, or another important use of the result. Ask what the proposed analysis can establish, its limitations, and whether it consumes or changes the sample. Photographs and careful notes can help the examiner plan the work, but they cannot provide a definitive composition or karat measurement. Preserve the specimen and its context while you arrange the appropriate next step.